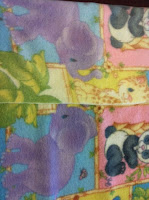
So Christmas is just around the corner, and I decided to make Kennedy, my nieces and nephews gifts this year. I am making no sew fleece blankets. I have two nieces, and three nephews, they range from 3 months to four years old.
I have found that Wal-mart has the cheapest fleece prices out there. Hopefully you are lucky enough to have a fabric department in your Wal-mart, I know we didn’t when we lived in Memphis. Right now at our local Hobby lobby they are having 30% off fleece also.
Materials:
v Two types of fleece- for toddlers 1-1 ½ yards of each You can use the same color, two different colors, prints, anything you want!
v Scissors
v Tape measurer or ruler
v Piece of paper or cardboard
For the infant blanket I am making, I purchased 1 Yard of each (2 yards total). For the toddler blankets I am making, I purchased 1 ½ yards of each (3 yards total)
 |
This is the pattern for my niece Chloe’s who is only three months old. 1 yard at Beverly’s fabric $12.99!! |
 |
This is the solid contrasting color I am using. 1 yard at Wal-mart $4.94!! Do you see the price difference!! |
 |
1.The first thing you do is lay the fleece out on a surface you can work on. I’m using my kitchen table and cut the salvage part off. |
 |
2. Now cut the other side, it usually curls up, and is sometimes thicker than the rest of the fleece. You should be able to feel the difference. Now repeat this step with your solid color fleece. |
3. Next take both pieces and put them together, lining up the edges so they are even(Make sure you have the right side up on the fleece that has the design. You can tell which side is correct because the right side up is usually darker then the wrong side.)
 |
4. You are going to have to trim off all the excess to make the two pieces even with each other. You can pin them together if you want. (I choose not too) |
 |
See how the top is a little lighter then the bottom? |
 |
All of your corners should look like this. |
Now we are ready to cut our fringes!
7. Cut 3” into both fleeces at 1" wide. Your fringes don't need to be 1" exactly, just try to keep them the same size continue to cut 1" intervals on all four sides.
 |
| 8. Once all your fringes have been cut, start at one end and tie a knot or two (make sure to tie both pieces together) I like to tie two knots, so it doesn’t come undone. |
 |
| Tie one fringe and skip the next fringe and move on. |
 |
9. Turn the whole blanket over and tie the remaining knots until your blanket is complete. |
 |
ALL DONE! |

This comment has been removed by the author.
ReplyDeleteThanks!! They are fun to make! :) post a pic if you make one!
ReplyDelete